Kerry's Hatch Chili Enchiladas
Beth Ribblett

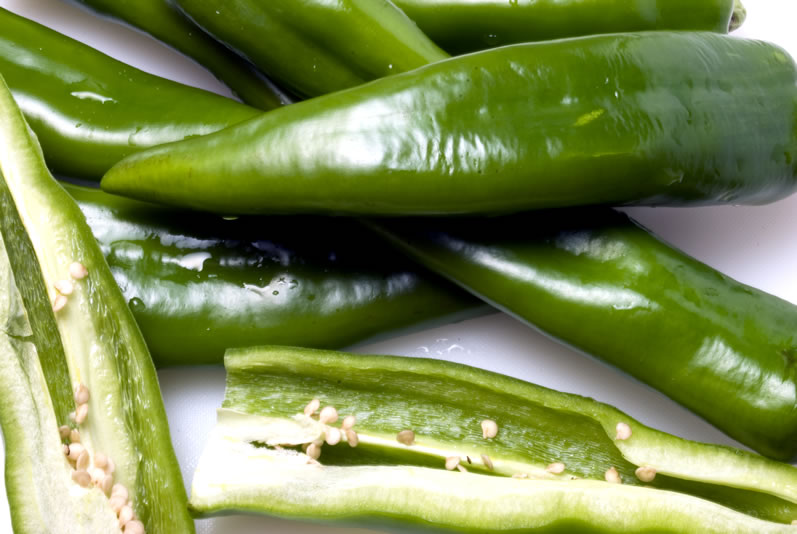
A few weeks ago, on one of my dreaded trips to Whole Foods on a weekend, I was so excited to see the giant display of Hatch Chilies. If you aren’t familiar with this particular variety of chili, let me explain. “Hatch” chilies are in actuality a variety of the common New Mexico green chili. These particular chilies are harvested in the Mesilla Valley of New Mexico for only a few weeks out of the year. The Mesilla Valley lies in the southern part of the state, running from Las Cruces north about forty miles to the small town of Hatch, from where the chilies get their name.
These chilies are grown nowhere else in the world, and connoisseurs consider this one of the finest. They are large (for chilies), about 6 to 7 inches long, with a distinctively robust and earthy flavor not found in any other chili.
I bought a few for us to grill, but Kerry was so excited to see them, she went back out the next day and bought a pound. She got out the grill, roasted them and made us the most delicious Hatch Chili Enchiladas, that my mouth waters just thinking about them!
Unfortunately the season is short, and I'm a little late with this post, so they are no longer available, but you can substitute Anaheim, or Pablano chilies or save this recipe for next year!

First the Roasting
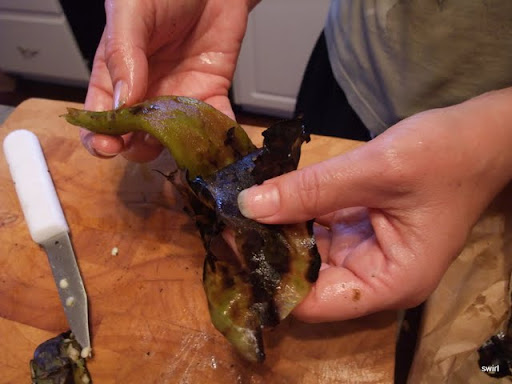
Get your charcoal grill white hot and lie the peppers directly on the grill. Let skins bubble up and get black and then turn so that they are evenly cooked. The goal is to blacken the skin without burning the flesh. Put the hot peppers in a brown paper bag to stem for 10-15 minutes. This will help loosen the skins and make them easy to remove.
Scrape the skins off the chili peppers with your fingers or a knife. Remember to use caution with hot chili peppers, the capsaicin is still in the skin even though it's been charred. Remove the seeds, stem, and veins if desired as well. Most of the heat is contained in the seeds and veins so removing them will take out some of the heat if the chili pepper is uncomfortably hot.
Chile peppers can also be peeled under running water in the sink. The water will usually wash the skins right off the flesh. Before rinsing, be aware that this can also wash away some of the smoky roasted flavor of the chili pepper.
Make the Sauce
3 tablespoon vegetable oil
1 large onion, chopped
3 cloves garlic, minced
2 tablespoons all-purpose flour
1lb Hatch Chilies, roasted, peeled and chopped (stems, seeds and ribs removed)
2 cups chicken stock
1 teaspoon salt
1 teaspoon ground coriander
In a heavy saucepan, warm the oil over medium heat. Add the onion and sauté until well softened, about 5 minutes.
Stir in the garlic and sauté for an additional minute, then add the flour and continue cooking for another 1 or 2 minutes.
Mix in the chili. pour in the stock and add the seasonings. Bring the mixture to a boil. Reduce the heat to a low simmer and cook for about 15 minutes, until thickened but still very pourable.
While the sauce is cooking, prepare the enchiladas:
Ingredients
10 (7- to 8-in.) corn tortillas
2 1/2 cups shredded cooked chicken from a rotisserie chicken
2 cups coarsely shredded cheddar or jack cheese, divided
Sour cream
Preparation
Prepare tortillas: In a small frying pan, bring remaining 2 cups chicken broth to a gentle simmer. Working one at a time, very briefly dip tortillas into broth to barely soften. Transfer each tortilla plate, add some of the shredded chicken and cheese, wrap tortilla around filling and transfer, seam-side down, to a 9- by 13-in. baking dish. Use 1-1/2 cups of the cheese for the filling, the other half will be scattered on top.

When the chili sauce has finish cooking, pour it over enchiladas and top with remaining 3/4 cup cheese. Bake until cheese is bubbling and golden, 15 to 20 minutes. Serve with sour cream.
Makes 5 servings; 10 enchiladas (serving size: 2 enchiladas)


